Luxury vinyl tile (LVT) replicates the look of expensive flooring options like hardwood and marble at a much lower price. It’s cost-effective, durable, and easy to install and maintain, making it an excellent choice for both residential and commercial applications. To learn more about LVT, check out our blog post.
Below, find our guide to installing LVT on your own. While we provide plenty of general considerations and guidelines, always refer to the manufacturer’s instructions throughout the installation process.
Considerations
Keep the following in mind as you install your new flooring.
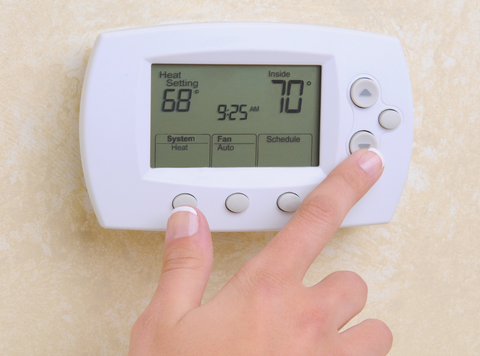
- Maintain a temperature between 55 and 85 degrees Fahrenheit before and during installation.
- Don't install additional underlayment if you’re using LVT with an attached underlayment pad.
- Give the LVT 48 hours to acclimate in the area where it will be installed.
- If you’re installing LVT on a concrete slab, you’ll first need to install a 6mm plastic moisture barrier.
- Mix and install planks from different cartons for natural-looking variation in appearance.
- You’ll need a minimum of 5/16” expansion space around the perimeter of the installation area. If the space is larger than 2500 square feet, a minimum of ½” expansion space is required.
- If the installation area is over 25 feet wide or 40 feet long, you’ll need to insert an additional expansion joint. Expansion joints are also required between adjoining rooms and in doorways. They should be covered by T-molding.
- Always store cartons of LVT horizontally and take care not to damage the corners of the cartons.
- Note that LVT can be installed on top of most existing hard-surface floor coverings, but it cannot be installed on top of carpet or wood adhered to concrete.
- If you have a radiant heat system, it must be installed, turned on, and operational for at least two weeks prior to LVT installation. Three days before installation, adjust the temperature to 65 degrees Fahrenheit, and after installation, gradually increase the temperature by five degrees at a time, never exceeding 85 degrees. It’s best to use an in-floor temperature sensor to prevent overheating. In addition, there must be at least ½” separation between the radiant heat system and the LVT.
- Do not nail or glue the tile to the substrate unless specified by the manufacturer.
Required Tools

Before you begin installation, you’ll need the following tools:
- Small rubber mallet
- Utility knife
- Tape measure
- Straight edge or carpenter’s square
- 5/16" spacers (for areas less than 2500 square feet) or 1/2" spacers (for areas 2500 square feet or larger)
- Tapping block of at least 10”
- Pull bar
Preparation
- Ensure the tile doesn’t have any defects. Contact your supplier if you discover any issues.
- Remove the baseboards.
- Undercut the doorway moldings by the thickness of the LVT so the flooring will fit underneath them.
- Make sure your subfloor is structurally sound, flat, clean, and dry.
- Decide which way you’d like to install the tile. We recommend laying planks parallel to the longest wall.
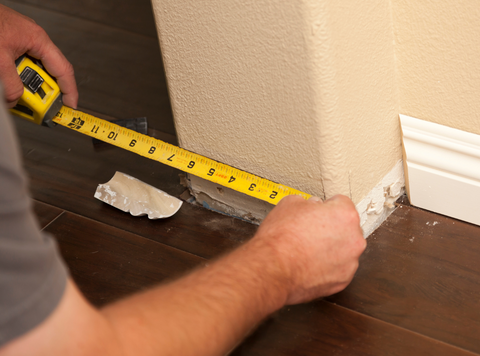
- Measure the room to determine the length of the last row of planks. It cannot be less than two inches (excluding the tongue). If it is, you’ll need to cut the first row accordingly.
- Remove any debris from the groove area of the planks.
Installation
Step 1: Begin laying planks from the left side of the starting wall, working toward the right side, with the tongue side of the plank facing the starting wall.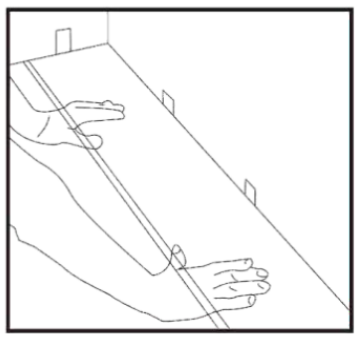
Step 2: Place 5/16” spacers between the planks and the wall. As you continue installation, the spacers should be placed between the spots where the planks join.
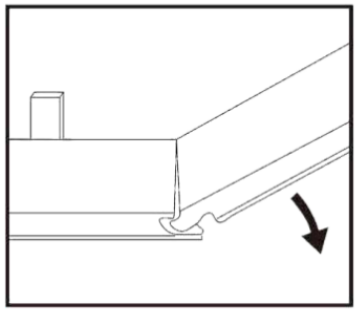
Step 3: To join the planks in the first row, insert the tongue side of the second plank into the groove side of the first plank at approximately a 30-degree angle, then gradually lower the plank until the end joint closes, ensuring the planks are aligned perfectly. Repeat this step until you reach the end of the first row.
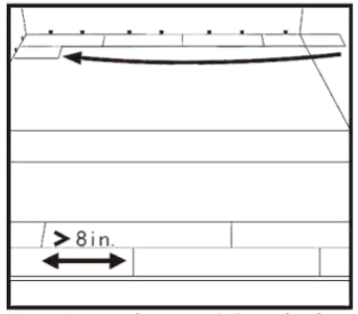
Step 4: The last plank in the first row will need to be cut. Measure the distance between the surface of the last full plank and the wall and subtract 5/16” to allow for the spacer. The remaining distance must be at least 8”. If it’s less than 8”, you’ll need to cut the first plank to allow for a longer plank at the end of the row. Both the first and last planks must be at least 8”.
Step 5: To cut the plank, score the surface with a utility knife and carpenter’s square or straight edge, and then snap the plank at the score line.
Step 6: You can use the cut-off piece from the last plank of the first row to serve as your first plank in the second row if it’s at least 8” long.
Step 7: Remember to stagger the end joints from row to row by at least 8”.
Step 8: Install the first plank of the second row by inserting the tongue side into the groove side of the first row at approximately a 15-degree angle and slowly lowering it. Continue placing spacers.
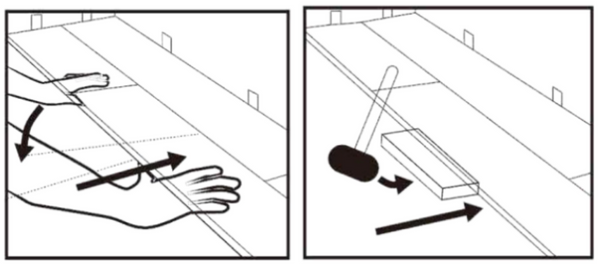
Step 9: Install the second plank of the second row by positioning the tongue side of the second plank overlapping the groove of the previous row’s planks by approximately ⅛”. Next, angle the end joint of the second plank into the previous plank. Angle the second plank up and gently push it forward until it locks into the previous row. You can use a tapping block and rubber mallet to ensure a tight fit.
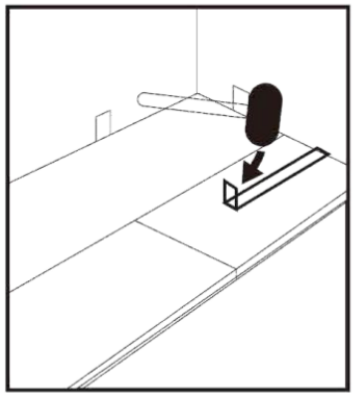
Step 10: Continue installing the planks in the second row. It’s crucial to make sure the first two rows of planks are perfectly straight and square, as this can greatly impact the rest of the installation. You may need to use a pull bar and rubber mallet to lock the final plank in the second row and all subsequent rows in place.
Post-Installation

- Once you’ve installed all the LVT planks, remove the spacers from the perimeter.
- Install transition moldings, but do not fasten them to the flooring.
- Reinstall the baseboards.
- When moving appliances and heavy furniture into the space, be sure to use furniture sliders to avoid damaging the flooring. Attach protectors to the bottom of furniture legs.
- Cover any exposed flooring edges by installing transition strips and wall molding.
- For areas prone to moisture, use a flexible silicone caulk to caulk the perimeter of the flooring.
- Sweep and vacuum the floor before mopping with a neutral-pH cleaner.
Caring for Your New LVT Floor

- Try to avoid exposure to direct sunlight for long periods of time, as this can fade the tile and lead to thermal expansion. We recommend using blinds or drapes during peak sunlight hours.
- Do not wax LVT flooring.
- Sweep and/or vacuum regularly.
- Mop with a neutral-pH cleaner as needed.
- Avoid using abrasive cleaners and products that contain bleach.
- Avoid sliding or dragging heavy furniture across the floor, and use furniture protector pads to prevent scratches.
- Mop up spills as soon as you can to prevent slipping hazards.
- Maintain temperatures lower than 95 degrees Fahrenheit in the installation area, as prolonged high temperatures can cause the installation to fail.
Tilezz.com: Your Ultimate Flooring Destination
At Tilezz.com, we have an extensive range of tile options for nearly any home renovation project. You can scroll through our full product line here, or check out our blog for plenty of informational articles and DIY installation guides. Plus, you can visit us on Pinterest for fun and fashionable interior design inspiration!