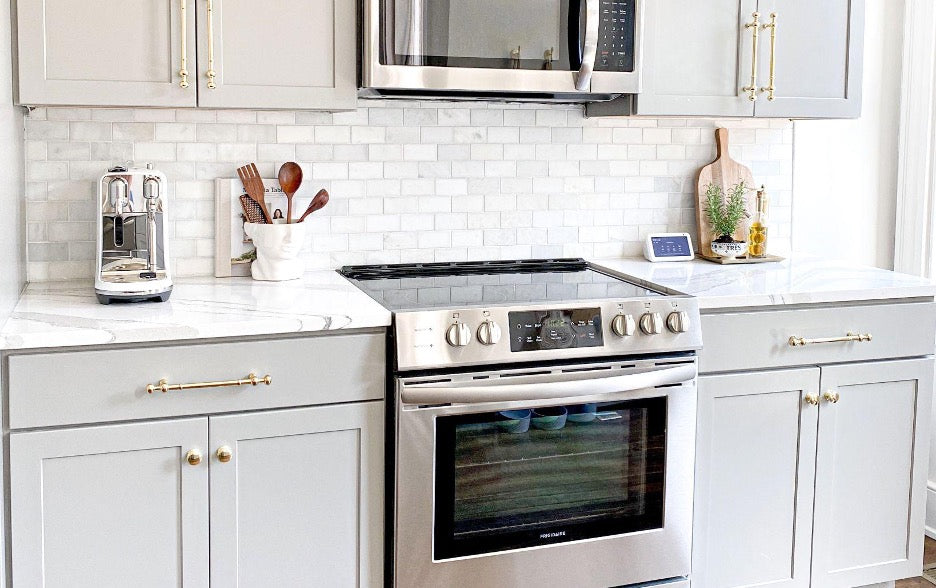
A kitchen backsplash is the span of material between the counter and the upper cabinets. You can think of it as a vertical extension of the counter. Backsplashes can be as short as a few inches tall, or they can extend all the way to the ceiling.
Backsplashes prevent water stains, damage, and marks from various gadgets and items that are stored on the counter. While they can be beautiful and eye-catching design elements, the purpose of backsplashes is to protect the wall behind them. You’ll most often see backsplashes around sinks and stoves, where splatters from water, food, and grease are most common.
Since their primary function is protection, the most vital feature for backsplashes is resistance to various substances that are likely to splash on them–particularly water and grease. The best backsplashes have a balance of functionality and visual appeal.
Backsplash Benefits
Aside from the element of protection that a backsplash provides for your kitchen walls, there are other advantages to having a backsplash. First, it’s an opportunity for you as a homeowner to express yourself visually. You can add quite a bit of personality and character to your kitchen by selecting a backsplash material and pattern that appeals to you.

Backsplashes add texture, color, and design to the kitchen and provide visual interest, tying together the overall interior design scheme. They can act as a focal point or statement piece for your kitchen, and they can also outline the areas of the room that get the most traffic and use, providing them with a protective barrier.
Are Kitchen Backsplashes Necessary?
While kitchen backsplashes aren’t a requirement, they’re highly recommended, thanks to their ability to protect your walls from splashes, splatters, and other forms of damage. Even if you’re able to keep water from coming into contact with the wall, it’s challenging to prevent items from being accidentally pushed up against the wall and leaving dents or stains. For example, food, cutting boards, and knives commonly come into contact with the area behind the counter, so if that area isn’t protected by a backsplash, you could end up with lasting damage and discoloration.
Think of a backsplash as a line of defense before water, food, grease, and other damaging substances reach the walls of your kitchen. A backsplash doesn’t have to be expensive or flashy; it just needs to be functional. And if you do want to go the extra mile and choose an eye-catching material or design, know that adding or renovating your backsplash is one of the easiest ways to transform and truly enhance your kitchen's overall look and feel.
Regardless of whether you want your backsplash to be a visual focal point or simply a functional part of the kitchen, it’s best to select materials that are highly durable and easy to clean. Note that paint is insufficient for use as a backsplash because it’s not durable or waterproof and will quickly chip away with frequent scrubbing.
Choosing the Best Backsplash Material
The best backsplash material can vary quite a bit depending on your design goals, personal preferences, and existing interior design choices. The main differences between the following materials are their appearance and their cost; generally, these materials are priced by square foot. Popular options like ceramic, porcelain, and marble are all very versatile when it comes to design, and they’re also well-suited to backsplash designs that never go out of style. Still, there are many other choices for material that you’ll want to consider when designing your kitchen backsplash.
Ceramic

Ceramic is an extremely popular option for kitchen backsplashes, thanks to the numerous options available in varying colors, designs, sizes, and price points. Ceramic allows you to be creative and construct a work of art with your backsplash. You can create unlimited looks with ceramic tile, including fun mosaic designs and classic subway tiles.
Plus, ceramic is highly durable and easy to clean, valuable traits for a backsplash material. It’s cost-efficient, lightweight, and easy to install as well. One thing to keep in mind with ceramic is that the smaller the tile, the more grout you’ll need to install, and the harder your backsplash will be to clean.
Porcelain

Porcelain has many of the same attributes as ceramic and comes with a massive variety of options, so you can create the look you want. If you love the look of marble but don’t love the price that comes with it, you may want to consider using glazed porcelain, which creates a similar aesthetic. Vitreous porcelain, which has a smooth surface, is very easy to wipe down and maintain. It creates a classy, stylish look for your kitchen.
Stone

Natural stone is another beautiful option for your kitchen backsplash that can bring a sense of warmth into the room. Put together with stainless steel, stone looks inviting and high-class. It’s a quality choice that is resistant to water, fire, and grease. There are a huge variety of options to choose from as well.
Stainless Steel

A stainless steel backsplash has a modern and industrial look. In comparison to traditional backsplash materials, it’s even more durable and easy to clean. However, there are a couple of things you should know if you select a stainless steel backsplash. First, it tends to be quite costly. Second, it’s best to hire a professional who has worked with stainless steel in the past to ensure correct installation.
Marble

Marble has long been known for its beauty and elegance, and it adds a sense of luxury to your kitchen when used as a backsplash. Marble contrasts nicely with dark-colored cabinets, and it’s generally very easy to clean. Still, marble tiles can be pricey, and they require extra effort to keep up with maintenance. In addition, you’ll need to be careful with your marble backsplash because this material can easily be cracked, chipped, and stained.
Glass

Glass backsplashes are becoming very trendy, especially sheet glass. There are several benefits to sheet glass: It’s easy to clean, low-maintenance, and adds a light-enhancing look that complements nearly any interior design style. Sheet glass and glass tiles alike add light and reflection and can make your kitchen seem larger. They’re also environmentally friendly and work well with many different countertop materials. You can paint the back of your glass backsplash (the side that rests against the wall) for a unique look, as seen in the photo above.
However, because glass is transparent, it’s generally more difficult to install and should not be a DIY project. This is because any flaws resulting from an improper installation process will be clearly seen.
Wood

While wood is an option for your kitchen backsplash material, it’s generally not recommended. Depending on the wood chosen, it can create a lovely rustic or even modern look, but it tends to be less functional than other backsplash material options. This is because you’ll need to go the extra mile to care for it by sealing it and applying varnish regularly. It’s also susceptible to water damage.
Backsplash Design Tips

Your backsplash can function as the true focal point of your kitchen, and it can add visual interest to your existing interior design. Here are a few tips to consider as you design the ideal backsplash.
Coordinate with Your Interior Design
When designing your backsplash, always consider the style of your kitchen. For instance, a modern kitchen would look great with a stainless steel and stone backsplash, but an old-fashioned or rustic kitchen might be more suited to a ceramic tile or hand-painted concrete tile backsplash.
Enhance Cohesiveness or Create a Focal Point
One option with your backsplash is to extend it throughout the kitchen. In small rooms especially, a backsplash that runs continuously through the kitchen can create a sense of cohesiveness.
On the other hand, you could choose to utilize a single backsplash in a large kitchen to create a focal point, or make one backsplash eye-catching and the others more neutral. Try mixing colors or creating a pattern to draw the eye to a specific feature of your kitchen.
Form a Pattern with a Border
One popular backsplash look is creating a border with one tile style that encases another tile style inside it. You could choose all solid-colored tiles, or find some unique hand-painted or otherwise more complex styled tiles to form the border.
Add Some Contrast to Your Kitchen

Regardless of your chosen material, backsplashes tend to look best when their colors contrast with the color of the kitchen cabinets. Let’s say you have dark wood or black cabinets. A white tile backsplash will create fantastic contrast and be highly visually appealing. Meanwhile, light wood or white cabinets look great with darker backsplashes or stainless steel.
Avoid Visual Discontinuity
When you’re adding a backsplash behind your stove, be sure to install tiles at least one row below the countertop height. This way, you’ll avoid visual discontinuity by preventing the sight of any uncovered part of the wall.
Backsplash Installation: Hire a Pro or DIY?
In most cases, it’s ideal to install the kitchen backsplash when you’re installing the counter. Still, you can DIY a new backsplash or hire a professional to put one in at any time. For the majority of backsplashes, the choice between hiring a pro and installing it yourself has to do with the material you’ve chosen. Some materials, such as stainless steel and glass, are more difficult to install and should be done by someone with plenty of experience.
If You Hire a Pro…
Think Through Installation Costs
A professionally-installed backsplash can vary greatly when it comes to pricing. Professionals typically charge either a set price per square foot of backsplash or an hourly rate. You’re not just paying for the materials, but also labor. Although many backsplashes are relatively easy projects that only take a few hours, kitchens with awkward angles and strange shapes will often end up with higher pricing due to the expertise and time needed to install the backsplash correctly.
Choose the Right Professional
When hiring someone to install your backsplash, you’ll want to ensure they have experience with the particular material you’ve chosen. Someone who is terrific at installing ceramic tiles may not have the specific skill set needed to install glass or stainless steel. If possible, seek out references to learn about others’ experiences with the professional you’re considering hiring.
If You Prefer to DIY…
Plan Out Your Project
Simple backsplashes are typically pretty easy to complete and only take a few hours, but it’s always best to begin with a clear plan to avoid potential mishaps. Before jumping into installation, take the time to thoroughly plan out the project and ensure you have all the tools, materials, and time you’ll need to complete it. Watch a few videos on installation and read articles for additional tips to prepare yourself as much as possible.
You’ll need to calculate the wall space to be covered. It’s best to purchase 10% more than you need in order to cover any gaps and replace damaged tiles.
Consider Your Grout Options
The type of grout you select for your backsplash has a considerable effect on the finished look, and it can also affect the type of maintenance you’ll need to perform to keep your backsplash looking its best as time goes on. You can select pre-mixed grout or mix grout yourself (we recommend pre-mixed grout because it’s much easier to work with and doesn’t require you to continually mix more grout throughout the project).
There are also various grout colors; light or white grout will brighten up the room, while dark grout can create contrast or mesh well with dark tiles. Remember, though, that if you select lighter grout, it will be more susceptible to staining, and you’ll need to keep up with maintenance if you’d like it to remain white. Darker grout tends to be much easier to keep clean.
To make the tiles themselves the focal point of the backsplash, it’s ideal to select a grout color that matches the tile color. But if you want to emphasize the pattern of the tiles rather than the tiles themselves, then a contrasting grout color is the better choice.
Don’t Forget to Prep the Wall
Good wall preparation will ensure that the installation process goes smoothly. You’ll want to make sure the surface is dry, flat, solid, and structurally sound. Start by removing anything attached to the wall, such as outlet covers, molding, and hardware. Clean the wall with mild soap and water.
Remove wallpaper or tile from the wall, patch any holes or cracks, vacuum away any dust, and use medium-grit sandpaper to create a slightly textured surface for the backsplash to adhere to.
Cover Kitchen Surfaces
Be sure to cover your appliances and countertops with drop cloths or plastic sheeting, so you don’t have to worry about them getting damaged or dirty during backsplash installation.
Mirror the Corners for Symmetry
When you get to a corner, you’ll probably want to continue from where the first piece left off. For instance, if you have a three-quarter piece on one wall, your instinct will likely be to add a one-quarter piece on the next wall to continue the pattern. However, it’s usually better to mirror the pieces instead because this creates aesthetically-pleasing symmetry. Therefore, after the first three-quarter piece, you’d add another three-quarter piece around the corner. While this might seem counterintuitive, the result is much more natural to the eye.
Follow These Simple Steps
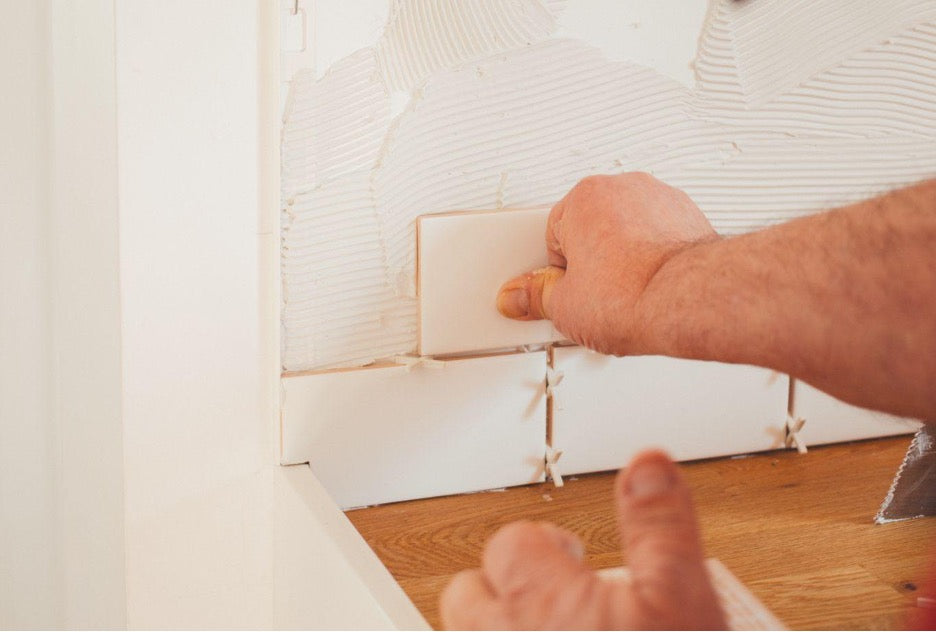
Once you’ve prepped the wall, the first step of the installation is to apply thinset mortar. You can do this with a cement board backer or apply it to the wall directly. The best way to do this is to begin with straight tile rows of about two feet.
As the thinset cures, continue to maintain those rows. Plastic spacers will help you do this effectively; these should be placed between the tiles to leave room for grout.
Once the thinset has dried, wipe off the excess with a sponge or toothbrush, remove the spacers, and use a rubber float to press the grout into the seams between tiles. A slightly damp sponge is perfect for removing grout from the face of the tiles. Once the grout is completely dry, consider applying sealer to help maintain the grout long-term.
Depending on the material you’re using, the manufacturer may provide slightly different instructions for installation. When in doubt, always refer to the manufacturer’s instructions.
Select The Perfect Material for Your Backsplash from Tilezz.com
Tilezz has a vast and beautiful collection of natural stone, porcelain, ceramic, and glass perfect for your kitchen backsplash. Take a few minutes to peruse our amazing selection and start planning out the backsplash of your dreams! With a wide range of materials, colors, styles, and prices, you’re sure to find exactly what you need.